


How to Replace Harley-Davidson Motorcycle Handlebars

What’s the first thing that comes to mind when thinking about riding your motorcycle? Not to get too sappy about things, but a good portion of us will probably picture grabbing the handlebars and thumbing the starter switch before what’s hopefully an epic ride – even if it’s only to the office.
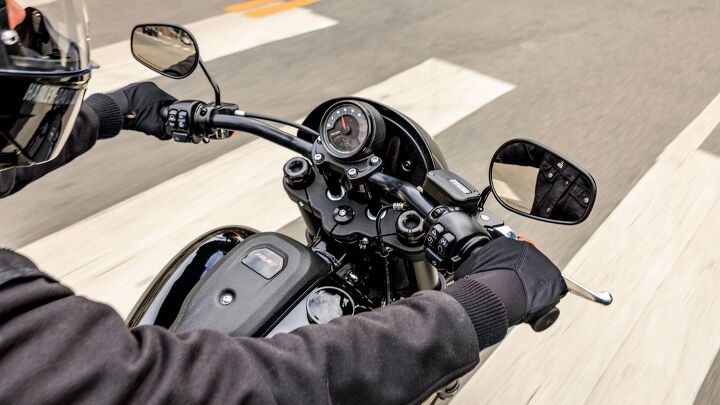
The handlebars are the main connection point to our machines, where the all-important throttle, brake, and clutch controls call home. Needless to say, they’re crucial, so it’s necessary to fit them for you. Motorcycles aren’t one-size-fits-all, and many riders might want to replace their stock Harley-Davidson handlebars with options that enhance ergonomics, appearance, or even handling performance in one fell swoop. Saddle up, partners, because we’re covering everything you need to know when replacing the handlebars on your Harley-Davidson motorcycle. Don’t own an H-D? That’s okay because these tips apply to most motorcycles regardless of brand.
Before diving in, let’s cover some important keywords and concepts you’ll need to know when selecting a new set of handlebars. Let’s discuss things like height, rise, sweep, and diameter and how they will affect the seating position of your motorcycle.
Promoted Product: Paul Yaffe 10" Chrome Classic Bagger Apes 1" Handlebars

There's nothing like an American V-twin bagger with a good set of ape hangers. Designed by renowned custom V-twin designer Paul Yaffe of Paul Yaffe Originals, these ape-hanger handlebars are manufactured in the U.S.A., offering a 10-inch rise, and are constructed from sturdy 1-inch diameter stainless steel tubing. Installation is made easier with predrilling to run internal wiring and the handlebar is notched for a modern electronic throttle. In addition, these handlebars are compatible with conventional dual-cable throttles and throttle-by-wire applications. Yaffe designed the Chrome Classic Bagger Apes to work with any Harley-Davidson featuring a "Batwing" fairing, but your custom build could work with them, too.
Use the Dennis Kirk My Garage Tool and get the right parts for your bike at your doorstep.
Height and Rise: Simply put, height pertains to handlebar height. Often, this term is used interchangeably with rise. The height of your handlebars significantly impacts the “rider triangle” because it helps determine where your arms rest when riding. Consider how you’d lean forward when using low-rise bars compared to tall ape hangers that will prop the rider in a more casual seating position. Beyond that, height is also a vital clearance consideration. Caution: If you add or reduce bar height, you must extend/shorten the brake/clutch lines and the throttle cables/throttle wiring. Not doing so can be extremely dangerous because you may restrict steering movement.

Risers: A riser is a mounting bracket that elevates the handlebar. Many stock motorcycles utilize risers in some capacity. In addition, many risers will relocate the handlebar closer or farther away from the rider – commonly known as “pullback.” For example, a riser mount with more pullback will move the handlebar closer to the rider.
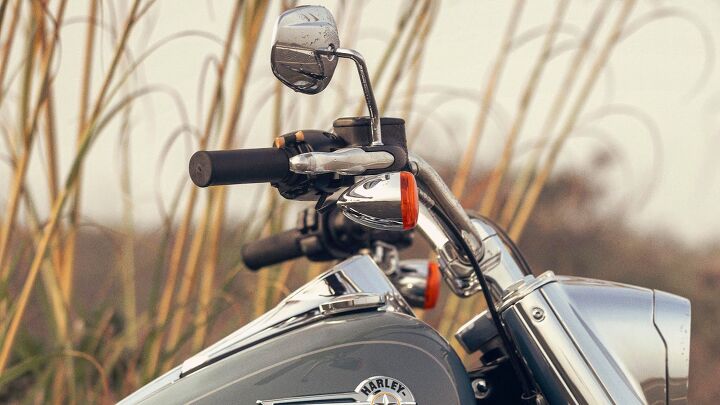
Sweep: Sweep is the angle at which the handlebar bends back from the stem. This term is used for both back sweep and up sweep. Consider the difference between a relatively flat T-Bar with little back sweep and Touring handlebars with a massive back sweep to encourage a relaxed riding position.

Reach: Reach is a byproduct of all these factors and, ultimately, how we “reach” the handlebar. Simply put, it’s the distance your arms must cover to get your hands on the bars when seated.
Dimpling and Slotted handlebars: These are two separate features but are often utilized together. Dimpling means that a bend is added to the underside of the handlebar grip area to allow clearance for stock controls and wiring. Slotted, also known as drilled, handlebars feature a hole to route wiring internally for a cleaner appearance.
Diameter: Diameter is the outside measurement of the handlebar tubing. Harley-Davidson has traditionally used a 1-inch diameter handlebar, though 7/8 and 1-1/4-inch diameter handlebars are used periodically, too. These are the most common sizes you’ll find on most motorcycles. You’ll want to match the handlebar brackets and hand control diameter specifications.
Pro Tip: Before buying new bars, do a mockup using some scrap cardboard, wood, or whatever you’ve got handy that’ll allow you to measure and get an idea of how a potential handlebar will fit.
How to Replace Harley-Davidson Handlebars
Changing handlebars is straightforward if you’re changing out handlebars with similar height/rise. As discussed before, those who are dramatically changing their bike’s handlebar height will need to replace brake/clutch lines and the throttle cables/throttle wiring.
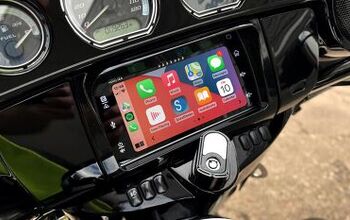
Break out the tools, cover your tank, fairing, or infotainment system, and let’s get to work. Make sure you have your phone handy to document the disassembly processes in case you get lost.

Prepare your motorcycle: Moving will be cumbersome once you’ve removed your machine’s handlebars. Securing it on a stand or a motorcycle lift is the best way, but simply finding a safe, flat place to rest the bike on its kickstand will do. Note the original orientation of your bars and even mark them with a paint pen in case you need to revert back to them.
Protect the goods: Lay down mechanical mats, thick blankets, or something similar to cover the fuel tank. Dropping tools or parts on the tank can damage things, so take a few steps to protect your bike.
Remove grips, bar ends, switch, levers, master cylinder(s), and mirrors: Always document how things came apart so they can go back together. Carefully remove the grips, controls, levers, brake and clutch master cylinder, and mirrors until the handlebars are bare. Try to avoid tangling any of the wiring or cabling. If necessary, disconnect the ride-by-wire throttle cable or electrical leads – this step applies to internally routed handlebar wiring.
Remove the handlebar: Loosen the bolts holding the handlebar in place. Be sure to grab the handlebar, as once the bracket is entirely loosened, the bars may fall in a particular direction. Remove the top portion of the stem bracket and remove the handlebar. You may need to coax wiring from the old handlebar gently.
Install the new handlebar: Position the new handlebars within the stem bracket and ensure they’re centered within the bracket. The knurling (textured surface in the clamping area) can often be used to center the bars. In some instances, the handlebars will feature centering marks. If those aren’t available, mark the center of the handlebar and use those as reference points. Note: If you need to route wiring internally, do so before installing the handlebar in position. An easy method to help feed the wiring through a handlebar is to tie or tape safety wire to one end and fish it through.
Begin reinstalling the grips, handle controls, clutch lever, master cylinder, and mirrors. Start by positioning your clutch lever and/or master cylinders, then refit the hand controls, throttle assembly, grips, bar ends, and finally, mirrors. Remember, secure everything hand tight as you’ll be adjusting. Reconnect all ride-by-wire throttle cables and electrical leads as needed.
Fine-tune positioning: Sit on the bike and dial your fit-in with everything back in place. You may need to roll the handlebar forward or back. In addition, the lever height must be adjusted to fit you precisely. Start tightening down each component when you’re happy with the positioning per manufacturer-cited torque specifications.
Test fit for clearance: Stand the bike up and move the handlebar to each side, moving from full lock to full lock. Check and recheck that you have no clearance issues from the handlebars, nor are any cables or wiring binding in any capacity when moving through any point of the steering sweep. At this point, start the bike, and with the engine in neutral, repeat this process. Ensure that no cables or wiring prevent your fork from moving as it should. Pro Tip: If you hear your engine revving without twisting the grip, your conventional throttle cable may be binding. This symptom won’t occur with a ride-by-wire setup.
Test clearance again: You might as well do it again, fellow MOrons. We can’t be too careful!
That’s it, folks. You’ve successfully changed out the handlebars on your Harley-Davidson (or any motorcycle, really). Depending on your make and model, things will change, but this is the general process that any owner can expect when swapping out some bars. So, break out the tools and get to it!
Become a Motorcycle.com insider. Get the latest motorcycle news first by subscribing to our newsletter here.
More by Edward Narraca


Comments
Join the conversation
Comments deleted and the note about this being partially written by AI is suddenly missing. SHADY.
HD is also the only manufacturer that I know of that has extensions available for the handlebar switch wiring. Much easier to plug and play than having to make your own.
Apes are an ergonomic disaster driven by form, not function.